

How To Make Leather Quick Draw Bracers
The Terminate of Time
Leather Bracer Tutorial
past Craig Goetz
Tools Needed:
~leather (8oz or thicker)
~ hammer + punch set or rotary punch (gay)
~box cutter (util. pocketknife)
~3 ft of latigo or durable boot lace
~oil-based leather dye (optional)
~sponge (optional)
~latex gloves (optional)
~posterboard or cardstock
~pencil
~paintbrush (optional)
~spoon (seriously)
EQUIPMENT AND WORKSPACE
Hello, and welcome to my newbie guide to armor crafting! We're actually going to skip all the opening stuff and jump right in. This is my workspace:

What I've got here is some 12-14oz (Amtgard-legal 2pts armor) saddle skirting. Pretty cheap stuff and it works well for tooling, shaping, and thick armor. And then i've got this gear up upward on a piece of plywood atop two saw horses. this is my preferred method, just feel free to effigy out what works best for yous, be it kitchen table, real work demote, or bedroom floor at 3 in the morning (not fun).

Here is my toolbox, just so y'all know. Left-correct, top-lesser nosotros accept eyelet setter/stud fixer, hammer-dial, buckles, stitching needles, wax-linen thread, rivet caps, rivet posts (large and medium), snap fronts and backs, tons o' studs, X-Acto Knife, various size pigment brushes, mechanical pencils, sponge for dyeing, punch pad (white block, pretty much but a kitchen cutting board that Ipaid too much for), red dye, black dye, black latigo lace (Note: I cannot interruption this stuff with pliers or by paw!)
PATTERNING FOR DUMMIES
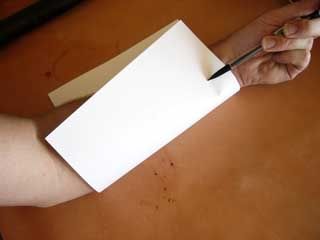

Okay, let'southward get started. Take a piece of posterboard or cardstock and put your arm in the dead eye. (Excuse my bad moving picture-taking; it'due south hard to get skilful photos when yous're holding tools/hardware in one mitt and Now fold each side up and make a mark where the heart of your arm is on both sides and at the height and lesser. Unfold and draw straight (or whatsoever) lines from wrist to forearm.

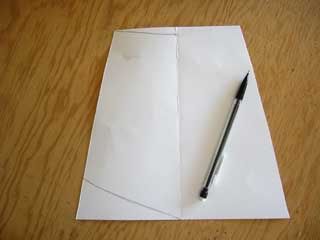
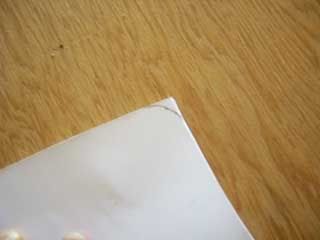
Fold the paper in half (the middle of your arm) and cut throught both layers of newspaper with a box cutter or scissors. One time yous have done this, make a line from the center fold about a half inch from the wrist edge. This is washed to let the bracer wrap around your wrist and not let it dig into the bones of your wrist. Trust me, this is important. At the other end, draw half of what you want the backside of information technology to look like. With this pattern, we're making a uncomplicated bending-to-point. Fold it dorsum in half and cut on the lines. Voila.
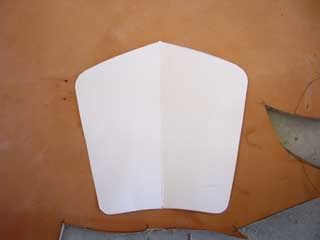
Describe and cutting rounded corners all effectually (except the point part at the elbow, if you fabricated it that mode) so you don't get poked by cowhide in battle. Lay the pattern out on the leather anywhere you desire, just it helps if you lot become shut to the border. Also be sure and bank check the thickness of the surface area yous're cut from, as you don't want a thick wrist and non-so-thick elbow part. That sucks. Draw around it wth a colored pencil or 6B drawing pencil or mechanical pencil or whatever. Just don't mess up if it'due south got color or ink. Yous'll regret it when dyeing and/or finishing. Toss or save the pattern and begin to make house (not pressing as hard as you tin, though) strokes with the box cutter along your lines. it should tae 3+ swipes with the knife to get all the way through the leather. If not, you're pressing likewise hard and run the risk of cutting on the inside of your lines, resulting in unsightly gashes in the meat of the armor. From hither on out, I will be using a pre-cut piece of leather from a couple of days agone, since Ialready have it and Idon't want to cut another bracer out right now. Information technology is a slight bit larger, but it all works the same way.
Oo. TIME TO Become Wet .oO
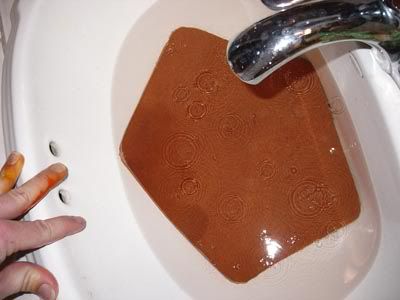
Later on your arm stops hurting (if using 12oz+ leather...) and yous wipe your brow, it'due south time to get your cutting slice and fill your sink/bathtub with tap water (best if water is softened, hard h2o is fine, though) merely enough so the leather sits completely under water. Be sure to put it under with the mankind side upwards (the rough side), and it should accept about a one-half inch or more of h2o clearance. Check out the squeamish bubble-action!
OOH, EDGY!
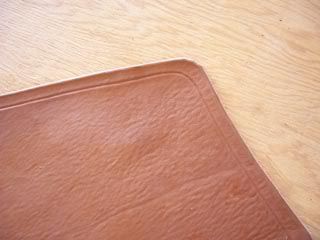
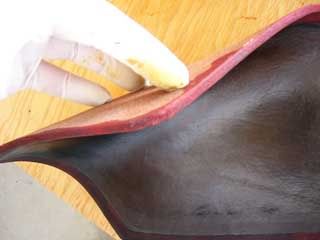
Have the leather out of the water when all the bubbles have stopped. (This tin take upward to 15 minutes, depending on the size and thickness of your piece.) I usually accept a towel and brush the surface and press the leather with the towel to get the backlog drippy-ness out. Put your leather onto your work surface and go out your spoon. Shown in this picture, I am using a $7 tool from the leather store, only a spoon works fine, trust me. Take the round side and rub the edge of the leather in the management of the grain.(Y'all'll know which direction the grain is after you effort this. Go both directions to see the deviation; it won't hurt anything. Just make sure the final product is going with the grain.)
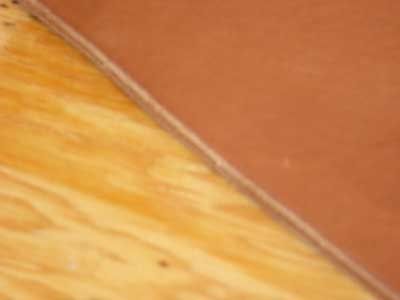
Do this with firm pressure, not all wimpy-like and stuff. Make your way all effectually the piece, existence aware of the grain direction on all edges. For perpendicular-to-the-grain edges, go either way, whichever feels all-time. Get those corners prissy and rounded! Now for the part that I always skip, but it's a bad habit to go into not doing. Flip the leather over and practise the whole process of rounding the edges and corners to the underside. It looks overnice, and information technology doesn't cut into you lot, or so I'yard told.
FUN PART FUN PART FUN Office
or
OPTIONAL Role OPTIONAL Office
Okay, if you have whatever artistic skills in drawing or designing, time now for tooling. I don't have as well much skill in the style of designing tooling patterns, but I enjoy doing it. Y'all don't demand expensive tooling... tools. Yous but demand something similar a paintbrush (use the backside, circular plastic end) or a golf tee (employ pointy finish, my personal favorite, but information technology's not too easy to concord and tires the hand out apace. best for small item work).
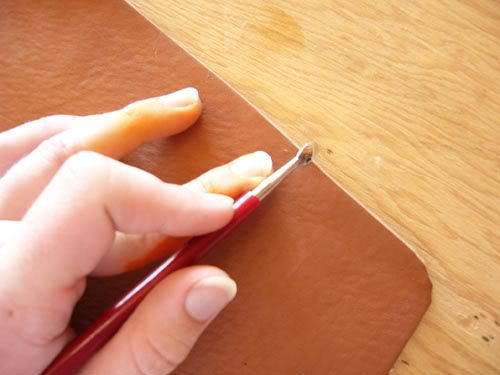
Hold the tool like I'g doing here, but contrary because most people aren't left-handed. From this point on, I volition be wearing latex gloves. I actually don't need them until we kickoff dyeing the leather, just I just felt like putting them on now. Property the tool similar this, with your ring finger against the outer edge of the piece will go along a semi-steady groove without the use of expensive saddle-run up groovers. I am and then cheap. Go effectually the entire slice, add flourishes at the corners if y'all want, practice whatever. I'thousand keeping information technology uncomplicated for now, because I'one thousand in a time slot betwixt class and piece of work.
~ TO DYE OR NOT TO DYE ~
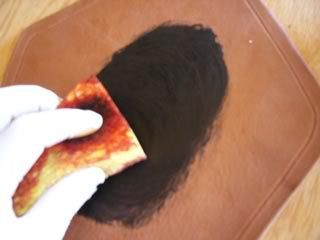
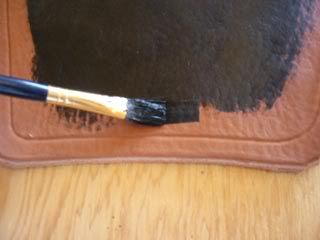
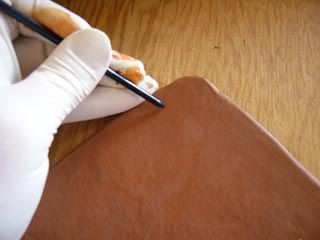
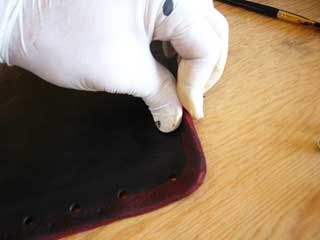
Here I am putting some dye into the leather, using a circular technique with a business firm hand. Not much to information technology, just kind of common sense. By the style, don't go all the mode to the edge of the slice, just go close to the groove we made earlier. Now have a paintbrush of some thickness and begin painting upwardly the the groove all the way effectually the leather. Not hard, either. Just don't slip into the outer edge, heheh.
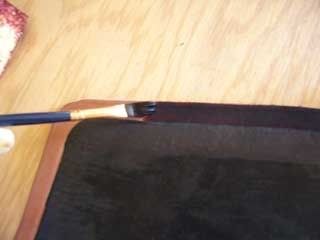
Y'all tin see that I am putting a different color around the edge for a sugariness consequence, simply what is it? It's actually just ruby-red, but it's darker-looking for two reasons. One is that the leather is moisture, and it causes dyes to look deeper than they will when it dries completely. The 2d reason is that I was an idiot and used a paintbrush that I had previously used for blackness (ii days before). Information technology bled the stale blackness pigment into the red and caused undesired effects. Oh well, this is simply a simple tutorial, cypher besides showy. Anyway, anytime y'all dye your leather, you should brush/sponge the edges and a lilliputian of the backside too. This looks better as a finished product, and you lot want it to look at least halfway decent.
Dorsum TO THE Primary COURSE

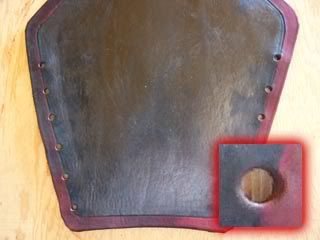
Take your golf tee or sewing needle or something prissy and pointy and mark forth the 2 forearm edges where your lacing holes will be. I opted for vi because I like spacing mine well-nigh an inch or so apart. I'yard not terribly accurate, and no one's going to criticize my inaccuracy in lace-holing while in mid-combat. Use a punch that is anywhere between 1/sixteen" and 1/eight" bigger than the diameter of your choice lacing. In the PIP on the right is a very clean view of a super-good-looking hole. Getting the dial out of wet leather is a task, but information technology looks expert afterwards, and it's easier to punch wet than dry.
A LITTLE Actress TIDBIT d-_-b \\=-//
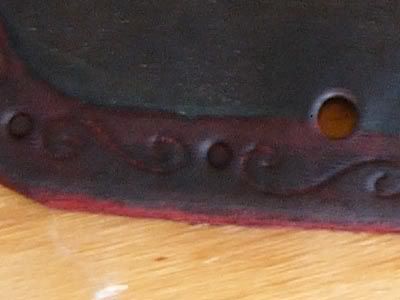
I decided to take information technology a step further and do a trivial more than tooling around the edges. I used a sewing needle in a pair of Vise-Grips (for extra handle length) and a ane/8" dial that was knocked less than 1/16" into the leather. I wanted to do just a little jazzing up, because it looked sort of banal around the edge.
Go BENT!
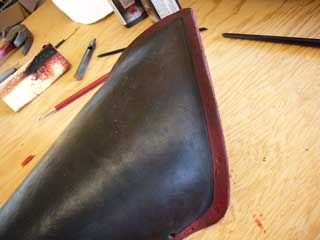
Now information technology'southward fourth dimension to scroll the edges out a little, but for a trivial flare effect. It's completely optional, simply it looks really proficient and keeps the leather from poking your arms an causing discomfort. Pretty basic procedure, and since the leather is however fairly wet, it stays very well.
SHOE LACES, Cracking!
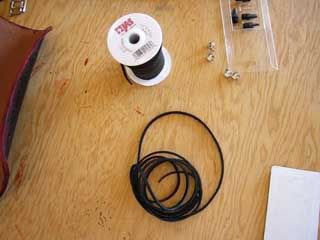

Well, not exactly shoe laces, but you could utilize them. I only hope yous're not that cheap... This is latigo lace, and it'southward really strong (as Istated in the beginning). 25yds for $17.99. A fiddling expensive, but worth it. You can also buy boot laces in 48" lengths, which I personally don't have experience with, but I believe it would be an splendid alternative. Boot laces necktie knots better than latigo, but I don't have that trouble. I don't fifty-fifty tie mine! I just tuck the ends of the laces up under my glove and off I get! Thread the lacing in a blueprint which you prefer. This is how I do mine (obviously). It is clean and very even, but that's because Ihate it when i is longer than the other. Anyway, after you lot lace them up, yous're finished!
Closing WORDS
Permit the whole thing dry overnight with the laces pulled as snug as it would fit your arm, or better yet, even tighter. That way when you go to put them on, they'll hold in place with a tighter fit and not rotate or slip on your arm. This is a very bones tutorial, and information technology is very adaptable to many other types of armor. Questions or comments welcome. Email me at [e-mail protected] or drop me a line at deviantART. Username is craiggoetz.

[I wish there was a counter here.]
All images taken and copyright 2005 CGi (Craig Goetz and directly affiliates)

Source: http://www.geocities.ws/craiggoetz/leather/bracer_tutorial.htm
Posted by: connobtionve.blogspot.com
0 Response to "How To Make Leather Quick Draw Bracers"
Post a Comment